The Eight Moods of Love: Exploring the Aṣṭa-Nāyikā in Pahari Painting
Love, longing, jealousy, anticipation, and devotion are among the most universal human emotions, and few artistic traditions have explored them as...
Shivani Gupta 22 June 2026

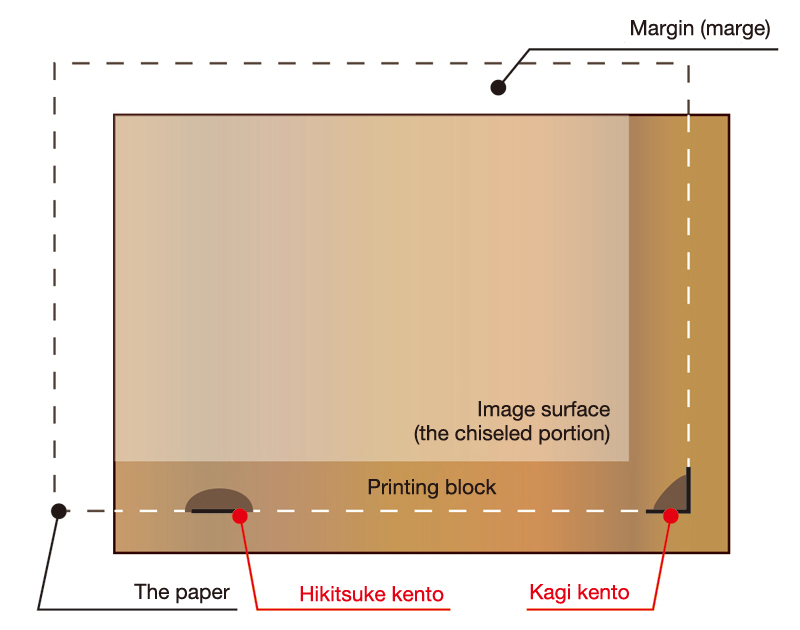
Utagawa Kunisada, Woodblock print triptych showing the process of printmaking, 1857, British Museum, London, UK. Detail.
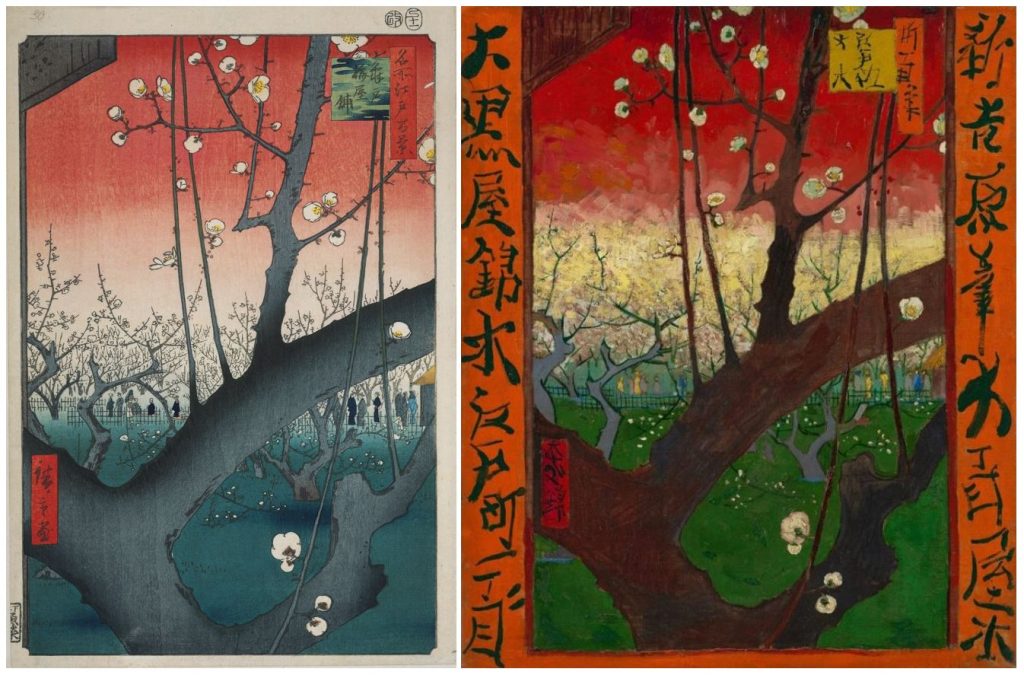
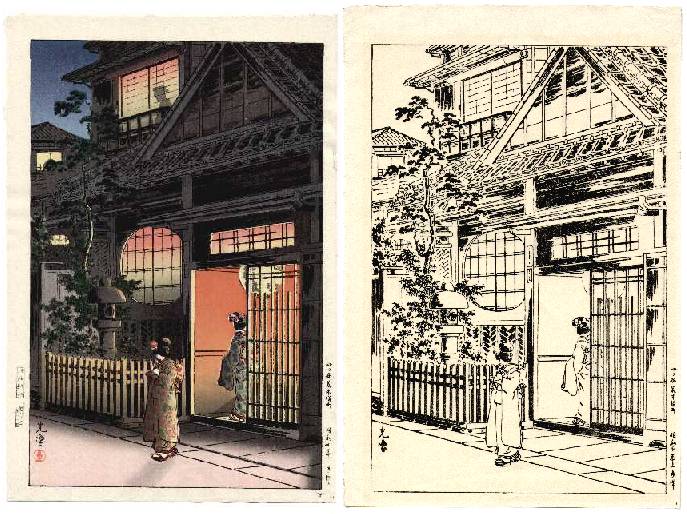
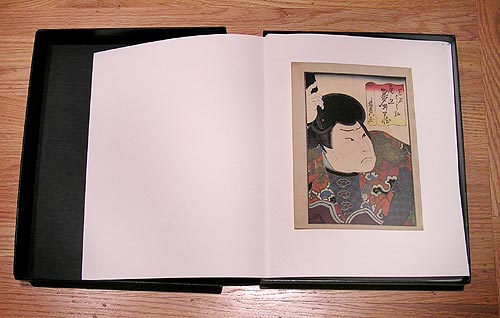
Hokusai’s Great Wave from the series Thirty-Six Views of Mount Fuji and Hiroshige’s The Plum Garden in Kameido from One Hundred Famous Views of Edo are undoubtedly the most famous Japanese woodblock prints in art history. Nevertheless, numerous other artists became famous during the Edo (1603–1868) and the Meiji eras (1868–1912). Their work fascinated and had a major influence on the late 19th-century European and American artists under the movement called Japonisme. Let’s look together into the intricate process behind Japanese woodcuts.
So, how did Japanese woodblock printing start, and what was the production process?
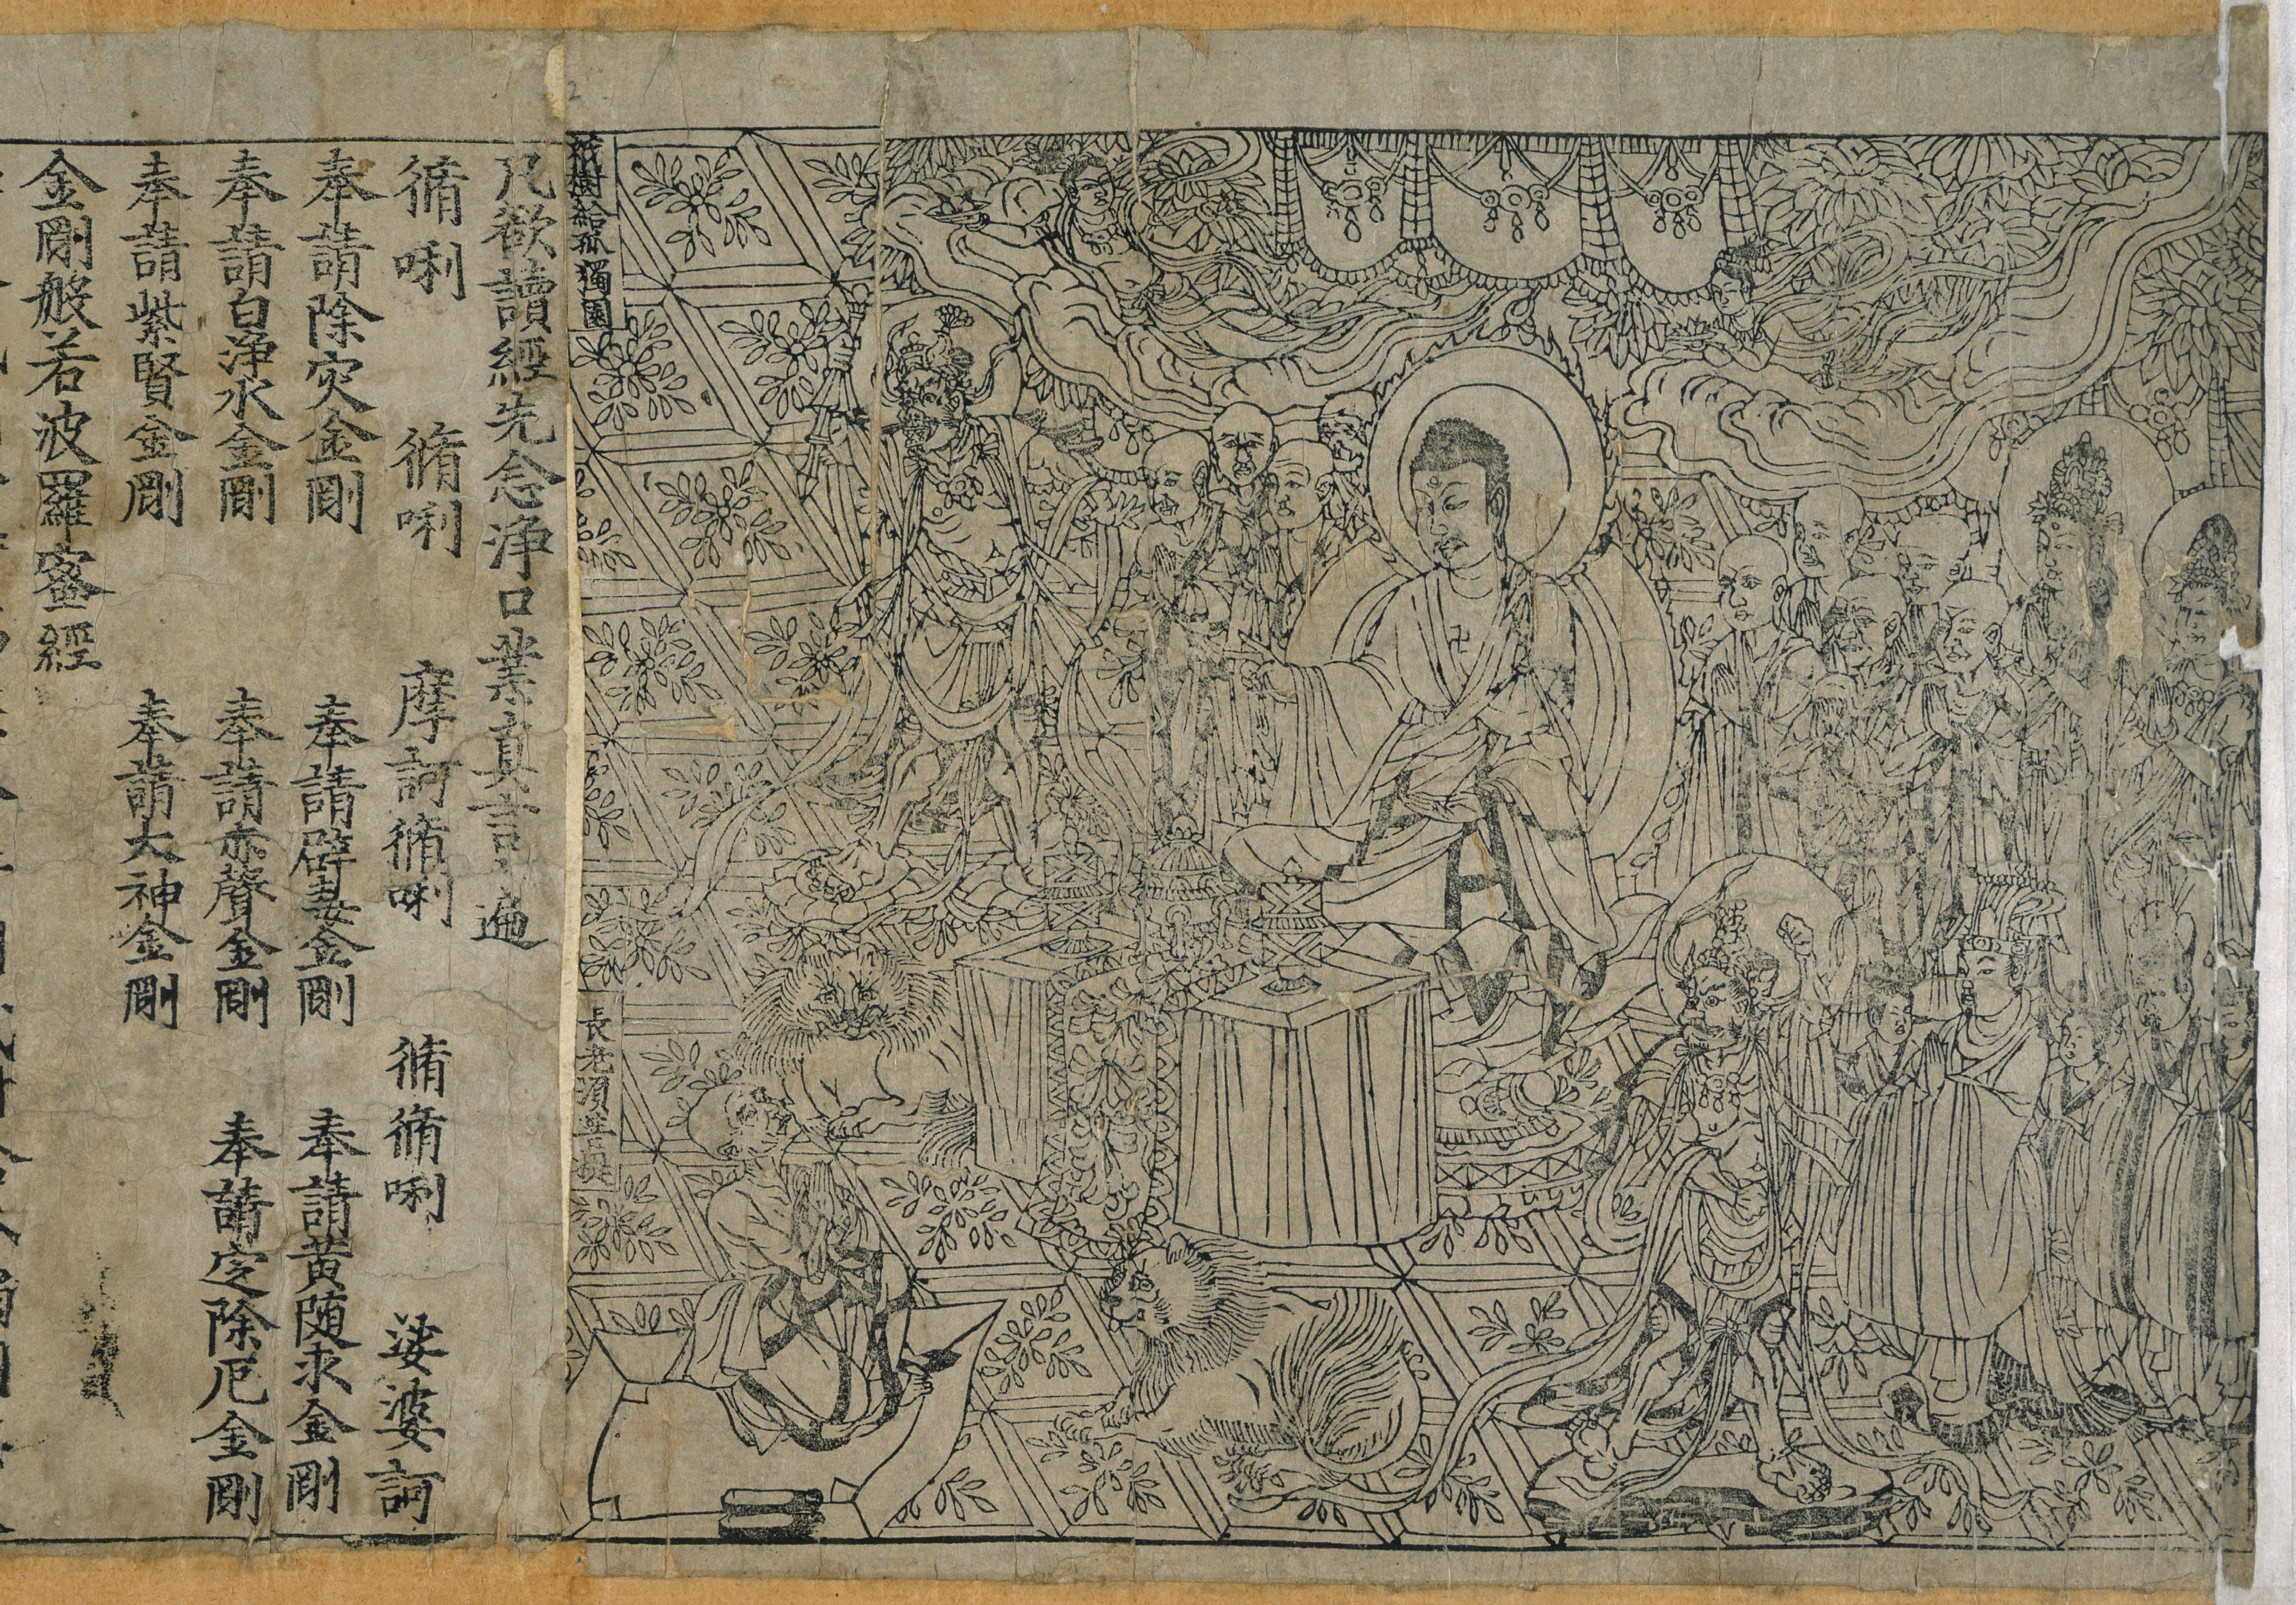
Woodblock printing was initially a technique for text or images, black and white printing, originating from China. It goes back as far as the 7th century CE and was used mostly for the spreading of religious materials, but not exclusively. Evidence of woodblock printing appeared in Korea and Japan soon afterward. Here many books were printed and published by woodblock printing at Buddhist temples in Kyoto and Kamakura in the 12th and 13th centuries. These were all printed with black sumi ink, which is mainly made from the soot of burnt lamp oil or pinewood, animal glue, and perfume.
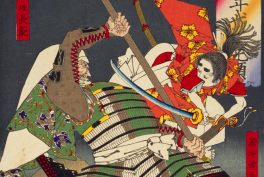
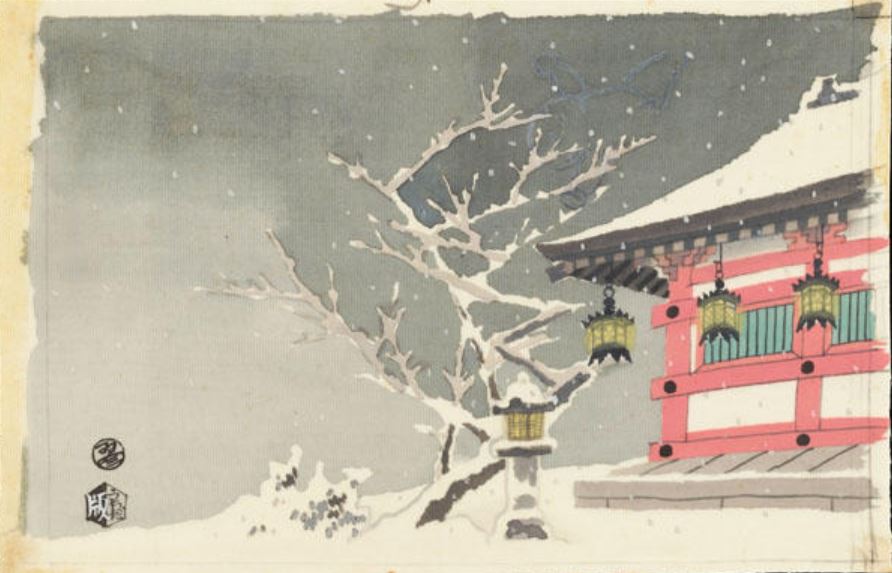
However, it was in the Edo period (1603-1868) when this technique became popular. It depicted the ukiyo-e, which translates as the “floating world.”
…living only for the moment, savouring the moon, the snow, the cherry blossoms, and the maple leaves, singing songs, drinking sake, and diverting oneself just in floating, unconcerned by the prospect of imminent poverty, buoyant and carefree, like a gourd carried along with the river current: this is what we call ukiyo.
Asai Ryōi, Ukiyo Monogatari (Tales of the Floating World), c. 1661.
In the beginning, after printing the images in black, the ukiyo-e artists colored images by hand using watercolor. Hishikawa Moronobu (1618–1694) was the first one to produce ukiyo-e woodblock prints, in response to the increasing demand for such works. He was also the one to produce single-sheet images, which could stand alone or be used as part of a series. Following the maturation of woodblock printing, official, commercial, and private publishing businesses emerged.
The process of printing Japanese stamps was undertaken by an entire publishing organization. The publisher would commission the artist to design an image. Then the carver or cutter would cut the woodblocks. In the end, the printer inked the woodblocks onto the washi paper – handmade paper from the inner bark of the gampi tree.
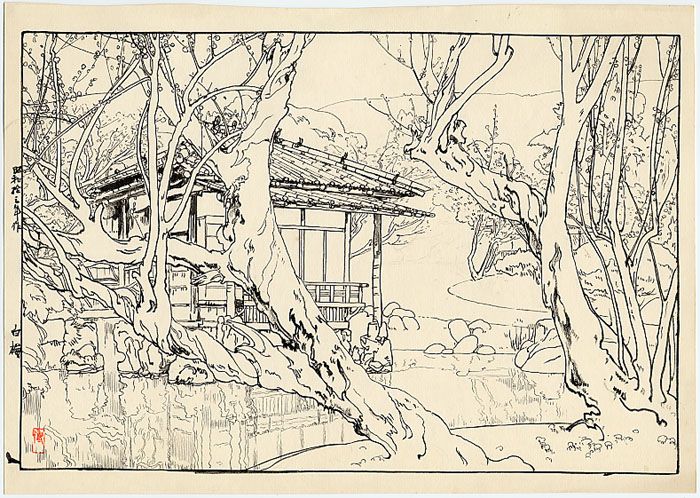
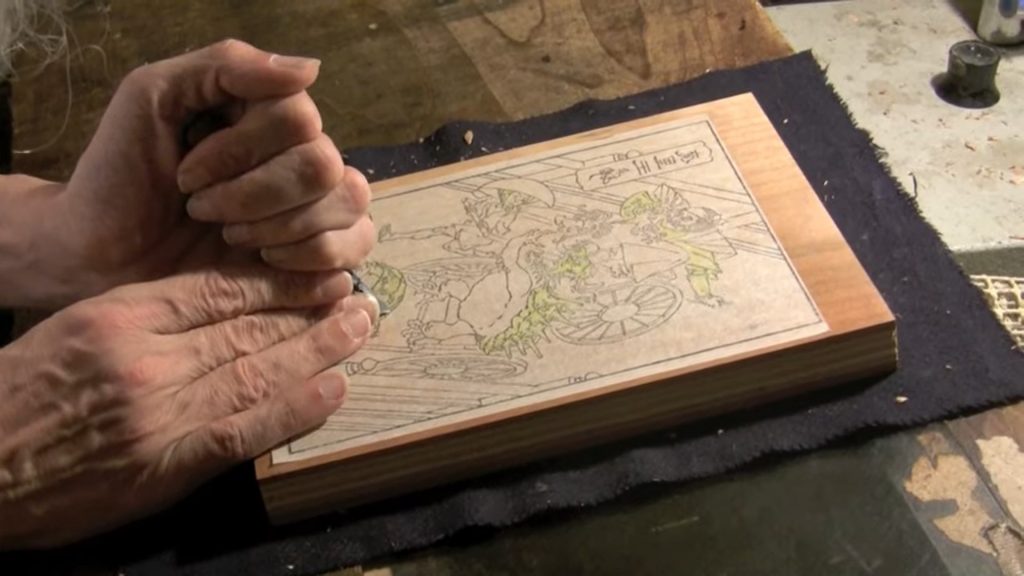
First of all, it is important to know that the artist must take into consideration the entire process in order to produce a good preliminary sketch. The artist makes the original sketch (genga) from nature, first on silk, then on paper. In older times, the artist drew their original picture on paper with black sumi ink. After that, the colors were merely indicated on the drawing by writing the word “red” or “blue,” or by giving a brush-stroke of colors. In our times, the genga is completely colored.
The next step is to make a sen-gaki, or outline drawing. This will be used in making the key block. The key block is the first block to be created, and the one that gives all the black lines of the final print. The outline drawing is extremely important because, after this one, all the colored blocks will be made. It should contain all the essential lines in the picture.
Cherry wood is desirable because it is easier to handle and less brittle, and very convenient for cutting and printing. It also has a special quality that gives nokori-enogu, that is the power to retain a part of the pigment after printing.
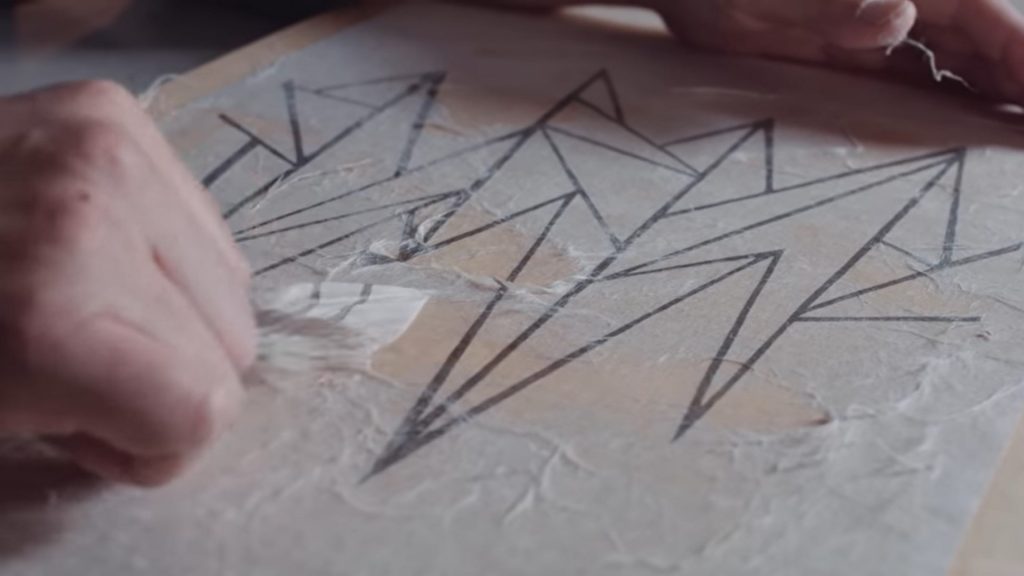
The paper with the outline drawing (sen-gaki) is pasted on the woodblock face down, the lines showing through the back of the paper. As this operation is extremely difficult, only the chief cutter was allowed to do this in the past. They knew the necessary amount of rice paste to be placed on the board and smeared all over the wood with the palm of the hand. Then the whole surface is tapped with the palm. This is done so that when the paper falls on it the paste does not immediately stick to the paper. When the paper is pasted firmly on the wood, and while it is still moist, the top layer of the paper should be peeled off by rubbing the surface with the fingers. This is done to get a clear definition of the lines drawn on the other side of the paper.
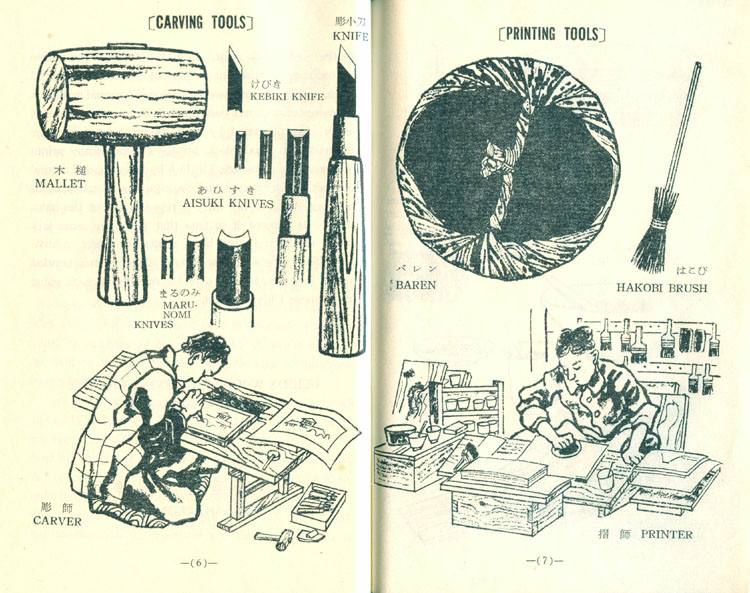
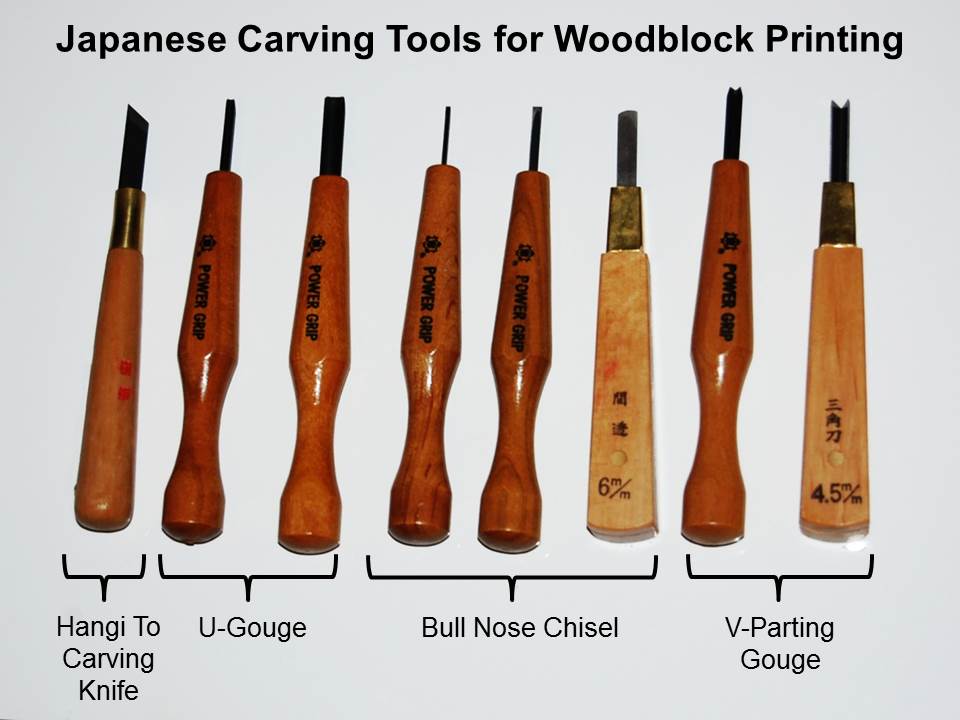
In cutting the key block several tools are necessary: a toh (knife), several aisuki (digging chisels), a couple of maru-nomi (rounded chisels), a hira-nomi (flat chisel), a few tsukibori (pushing chisels), a mallet, a small saw, and a grindstone. One way is to cut the lines with a knife exactly as drawn. This was the case in the Edo period. For handling the knife in Japanese fashion, the knife is drawn toward oneself and not pushed away. The artist cuts the block with the knife as if they were using their brush in painting. It is difficult to keep the knife from slipping when cutting.
The cutting is generally starting from the middle of the block and would be easier to continue if the block is revolved.
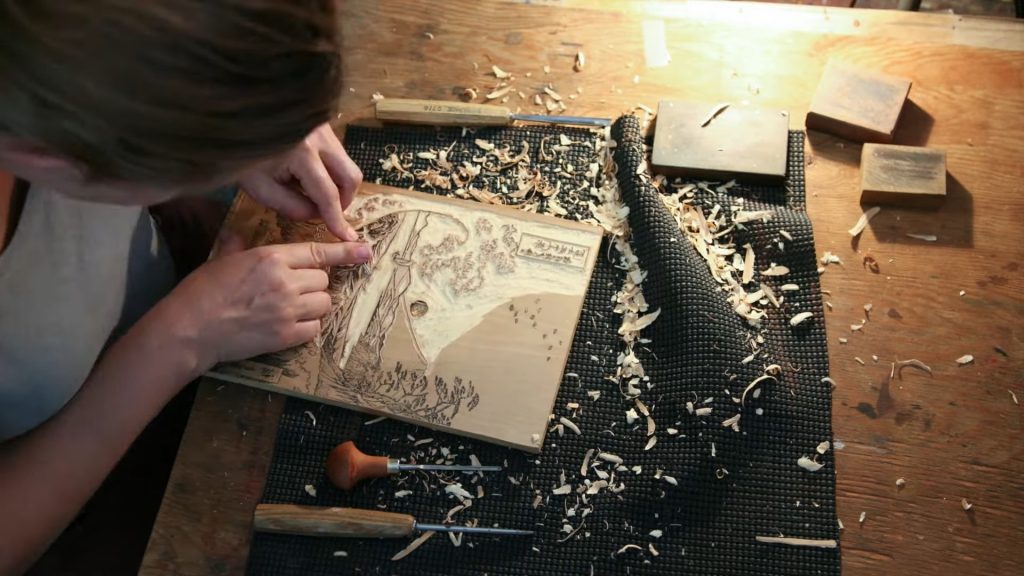
In older times cutters were specialized: kashira-bori and do-bori. The heads and hands of the figures were cut by the former; the bodies, the background, and the rest by the latter. The lines of the features were cut much finer than the brush could render them. In this respect, the cutting was similar to Western engravings.
Impressions from the key block are known as kyogo. They are extremely important as, from them, different color blocks are made. Care must be taken not to wet the woodblock too much in printing kyogo from the key block, for this will moisten the paper too much and when the paper dries the result will be a shrunken kyogo.
Color printing arrived in books in the 1720s and single-sheet prints in the 1740s, with a different block and printing for each color. The various portions of the picture requiring the same color are to be cut on one block. A kyogo is used for every color required, to indicate the parts to be used for that color. If the print calls for twenty different colors, twenty blocks are necessary.
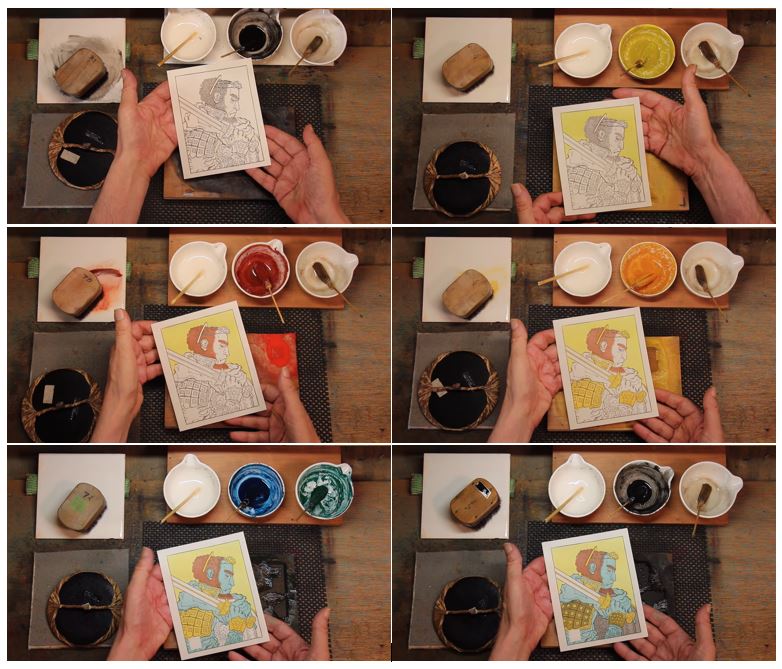
The number of blocks may be diminished by combining different color blocks into one. Sometimes the same block may be used for printing different colors at the same time. For instance, a portion of the block may be covered with one color and the rest with another color, and both be printed at the same time or the same block may be used over again with another color, thus producing a different tone. It is also possible to have both sides of the woodblock cut.
Early prints were limited to two colors, pink and green; from the 1740s to about 1765 the first block of printed colors appeared on simple two or three-color images. The so-called benizuri-e (red pictures) utilized red, blue, or yellow. Sometimes these colors were over-printed to create the secondary colors: purple, orange, and green. Techniques expanded over the following two decades to allow up to five colors.
Printers first used natural pigments made from mineral or vegetable sources. The dyes had a translucent quality that allowed a variety of colors to be mixed from primary red, blue, and yellow pigments. In the 18th century, Prussian blue became popular and was particularly prominent in the landscapes of Hokusai and Hiroshige. Cheaper and more consistent synthetic dyes arrived from the West in 1864. The colors were harsher and brighter than traditional pigments.

Special care is needed in the pasting of the kyogo on the blocks. There must be an exact register for all the color blocks when printed. One must not forget also about the register marks, the kagi, and hikitsuke. Kagi kento (L-mark) and hikitsuke kento (straight mark) are registration marks that are carved on the woodblock as markers for accurately placing the paper in the correct position for printing. These marks were printed on the kyogo, and now they are to be cut on each block.
The pasting of the color blocks (iro-sashi) is the same as the pasting of the sen-gaki (outline drawing) for the key block, but the difficulty is greater with the color blocks. The reason for this is because there are to be many of them and they must all be the same in order to obtain an exact register through the course of printing the different colors.
The cutting of the color blocks does not require as strict accuracy as in the case of the key block. When the set of blocks required for a print is cut and finished, the paper left on the board must be washed or peeled off the block. Then the trial printing is in order. It is necessary to print five or ten sheets before everything can be adjusted. This is the time for the artist to review the work. Out of five or ten trials, a satisfactory one may be obtained and this will be used as the standard for the rest of the prints.
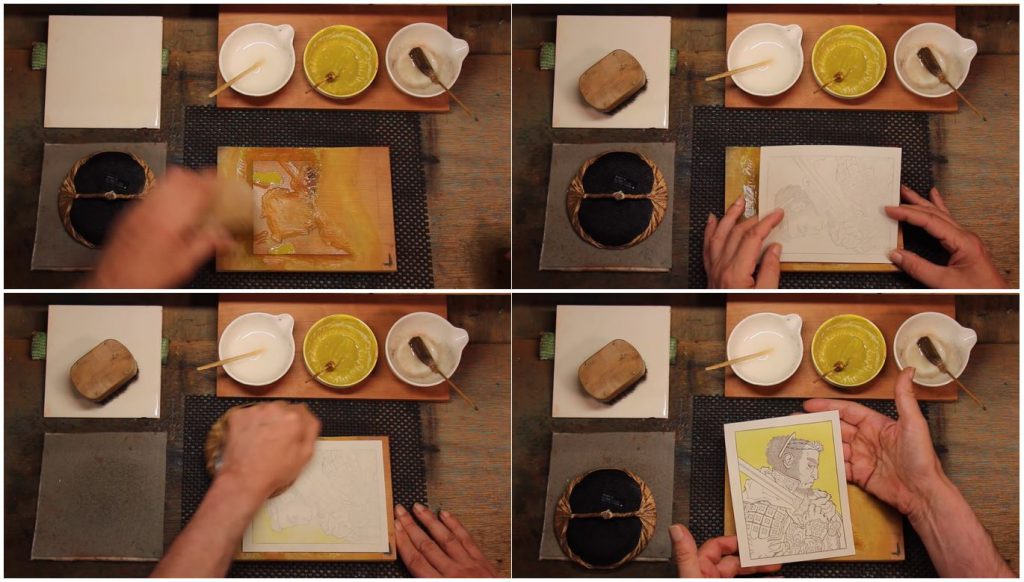
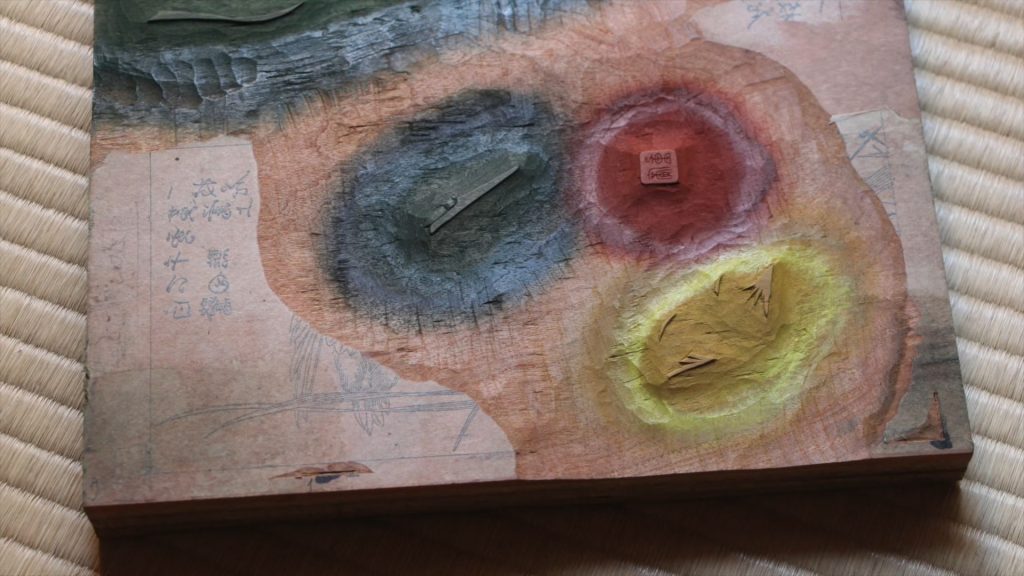
The essential tools for printing consist of the brush and the baren. The (hon) baren is a pad of twisted cord covered with paper, cloth, and bamboo leaf with which a printmaker transmits pressure typically by rubbing on paper laid on an inked woodcut. The baren must be slightly oiled in order to have it move smoothly.

The printer sits down in front of a low table. Often the weight of the whole body is necessary in printing, and in order to give strength the whole arm should be moved, not merely the hand. The pigment is placed on the block with a tokibo, a type of brush made of bamboo leaves. This is kept dipped in the bowl of pigment and spread over the block with a big brush by rubbing it over the block to ensure a uniform application. A small quantity of paste made of rice is also placed on the block with a stick and then the brush is used to spread the color and paste together at the same time. The paste must not be mixed in the pigment before being placed on the block.
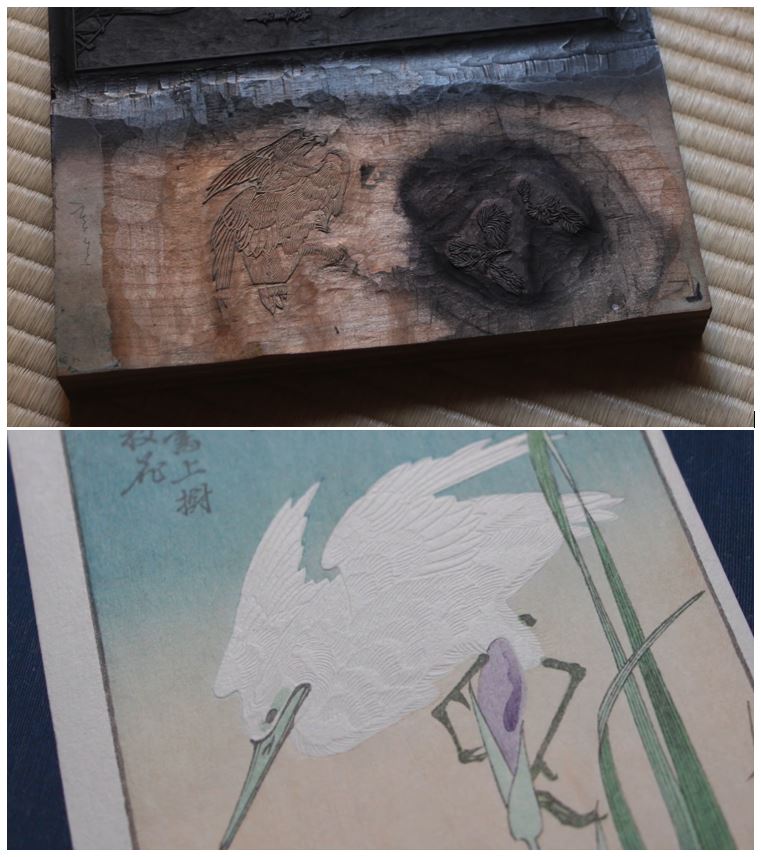
Special effects can be obtained through a technique similar to embossing. The woodblock is carved according to the model desired, but at the printing stage, no color is applied on the block, so that after pressing with the baren a relief model remains on the paper.
When the printing is all done, it is necessary to dry the prints as soon as possible. In drying, the best method is to place a newspaper between each print. Within an hour nearly 50 percent of the moisture will be taken away. Then the prints should be placed between cardboards, one cardboard between each print, and a weight placed on the pile. This allows the cardboard to absorb the remaining moisture, and at the same time keep the paper smooth and flat. Generally, the prints are kept for three or four days between cardboard and the print is ready. Ready to become a masterpiece.
Japanese prints are very susceptible to fading, so protecting them should be a primary concern of collectors and curators. To correctly store the prints is to put each print within a pH-neutral paper folder and store it stacked with others inside rigid solanders. The papers and the linings of the boxes must all be made of acid-free (pH-neutral) materials!
One of the beauties of looking at Japanese prints is to hold them in your hands, feel the paper, examine the back, and so on. This should always be done with two hands, one on each side of the print, with a gentle grip, taking care not to crease, dent, or otherwise harm the print.
David Bull, Your First Print, an introduction to Japanese Woodblock Printmaking, 2009.
A Hiroshige Reproduction, Posted by David Bull via YouTube, 18 Jun 2017. Accessed 28 Aug 2021.
Ukiyoe Heroes (2) : cutting a colour block, Posted by David Bull via YouTube, 27 Jun 2012. Accessed 28 Aug 2021.
Woodblock Printing Process … in 3-D spatial audio, Posted by David Bull via YouTube, 01 Jul 2021. Accessed 28 Aug 2021.
How Did Hokusai Create The Great Wave?, Posted by Christie’s via Youtube, 12 Apr 2017. Accessed 28 Aug 2021.
Hiroshi Yoshida, Japanese woodblock printing, 1939, Sanseido Ltd, Tokyo & Osaka, Japan.
DailyArt Magazine needs your support. Every contribution, however big or small, is very valuable for our future. Thanks to it, we will be able to sustain and grow the Magazine. Thank you for your help!

I am an art historian working as an IT Sales Manager. Currently, I am a master's student at the Center of Excellence in Image Studies researching Dutch and Flemish Renaissance Art. I love traveling, visiting museums and exhibitions. Together with my daughter, I live in Bucharest, Romania
Love, longing, jealousy, anticipation, and devotion are among the most universal human emotions, and few artistic traditions have explored them as...
Shivani Gupta 22 June 2026
The Lion and Sun motif is a widely recognizable symbol associated with Iran. While both lion and solar imagery were present in the art and mythology...
Maya M. Tola 6 April 2026
The bronze sculptures of the Chola period are among the most refined and enduring achievements of Indian statuary. Created between the 9th and 13th...
Maya M. Tola 12 June 2025
The Red Fort, or Lal Qila, stands as a commanding symbol of India’s rich cultural and political heritage. Commissioned by Mughal Emperor Shah...
Maya M. Tola 23 June 2025


